THUNDER BAY – FOOD NOW – I have a whole shelf’s worth of books on the art of preserving — from the “Ball Complete Book of Home Preserving” to Sandor Katz’s “Wild Fermentation.” All of them attentively detail the equipment, ingredients, safety measures and mechanics of food preservation. But not one of them reveals how an everyday cook can reasonably manage the workload of canning in the home kitchen.
After 15 years as a devoted food preservationist, I can tell you that things can very quickly get out of hand, even small-batch canning. What with washing and sanitizing jars, peeling and cutting fruits and vegetables, and timing the steady boil in the giant cauldron called a canner, it’s always more involved than I remember. So what’s a beginner to do?
Two preservation approaches
One method is to enlist a willing and capable friend, commandeer the kitchen and invest an entire weekend in a task like canning salsa, applesauce or jalapeño jelly. I used this full-court-press approach for years and put up a lot of food in jars, but it left me exhausted, and even the kitchen took days to recover.
If you want to have the endurance to preserve the best local foods from June’s cherry season all the way through the last of the fall tomatoes, there’s a different way. It’s a practical, slow-and-steady, small-batch approach I’ve adopted for all of my solo canning endeavors.
You won’t find any of these five simple practices on the website of the National Center for Home Food Preservation (the authority to reference for tutorials, tested recipes and food-safety guidelines), but I’ve found them essential for keeping me happily productive over the long haul of the growing season. The collection of filled food jars you amass is its own reward — one that feels as good as money in the bank.
Best practices for preserving
Adopt the correct mind-set: Preserving food occurs in the kitchen, but do not mistake it for cooking. It is a mechanical procedure that requires tight organization, cleanliness and precision (for example, the instructions to leave half an inch of headspace in a pickle jar exist for good reason). So clear off your countertops (you are going to need a lot of space!) and follow all the established and time-tested procedures of your chosen recipe and canning guide to the letter. Put on a great playlist and embrace the labors of the project.
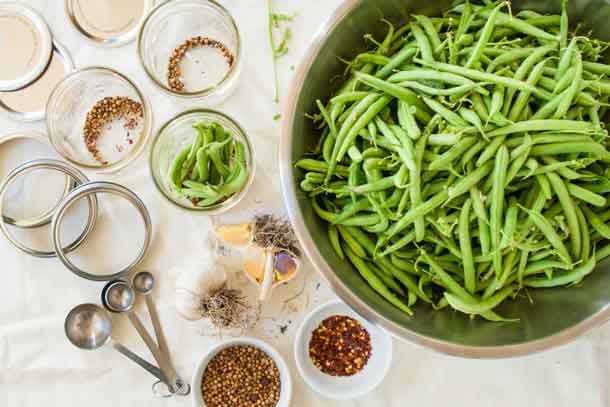
Create a command center: The equipment and tools for canning are not everyday cookware. So gather the canner, jar lifter, lid rings and other paraphernalia into one designated area of your kitchen or in a box or milk crate. Then, when the tomatoes or peaches arrive at peak ripeness, you’re ready for them. In addition to the ordinary supplies, I recommend having a set of nesting mixing bowls, extra measuring spoons, a sheet pan for loading and transporting hot jars and paper towels for wiping jar rims.
Prep in advance: Did I mention to clear off your counters? Having an uncluttered workspace is priority number one for not only practicality but your enjoyment of the process. In addition, there are lots of tasks you can tackle in advance, like scrubbing and trimming vegetables, preparing brine for pickles and gathering ingredients so they’re at your fingertips. Read through your recipe in advance to identify all of the small details that will make everything go smoother and quicker on canning day.
Choose your most productive time of day: When my kids were little, I canned only after bedtime. Now I prefer to wake up early, pour myself a cup of coffee and get a canner load boiling before the kids wake up. A weekend afternoon, an evening — whenever you’re at your most energetic — is when you’ll enjoy this project the most. Be sure to free up a block of time with no other demands to distract you from the work at hand. For instance, two hours is my minimum for pickling, which is pretty quick.
Make a washing station: No preserving book I’ve ever read reveals the fact that canning involves rounds of hand washing from start-up to clean-up. (Sure, you can wash and sanitize your canning jars in the dishwasher.) The single biggest labor-saving task I’ve found is to set up a dedicated washing station. If you don’t have a second separate sink as I do, fill two dishpans — one for washing, one for rinsing — on an area of your tidy countertop. Place a dish rack on the side and stock plenty of clean dish towels. Now you’re ready to begin!
A bonus tip
It’s ironic that on the very day that I’m striving to prepare healthy local foods for my family in the long run is also the day my kids eat hot dogs for dinner. The truth is that you cannot simultaneously preserve foods and cook a meal, no matter how simple. With stove and sink space at a premium and your energies tapped out, plan to serve yourself and your family a ready-made or take-out dinner that requires no cooking or dishwashing at all. You’ll be thankful in more ways than one!
Copyright 2016 Lynne Curry via Zester Daily and Reuters Media Express


